Here’s a brief guide on adjusting your website’s preloader settings, letting you control how (or if) a loading animation appears before your site is fully displayed:
-
Access Your WordPress Dashboard
Log in to your WordPress site using your username and password, as mentioned in “How to Log In to Your WordPress Dashboard”. -
Navigate to the Customizer
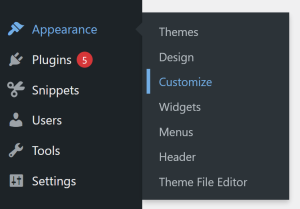
From the dashboard, go to Appearance > Customize.
-
Find the Preloader Section
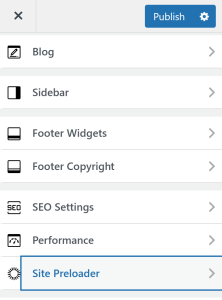
In the Customizer, look for General Options > Preloader. This is where you manage all preloader settings.
-
Enable or Disable the Preloader
Toggle the preloader on or off depending on whether you want a loading animation to appear before your site loads.
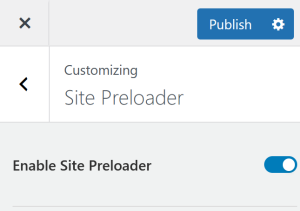
Here, you can choose to change options such as the style, type, colors and typology. -
Preview Your Changes
Use the live preview to make sure your chosen preloader fits the look and feel of your site. -
Save Changes
When you’re happy with the setup, click Publish to apply the updated preloader settings to your live website.
A well-configured preloader can smooth out the user experience on slower connections or heavier pages, making the site feel more polished while it loads.