Here’s a brief guide on customizing the style of your blog archive pages using the OceanWP theme in WordPress:
-
Access Your WordPress Dashboard
Log in to your WordPress site using your username and password, as mentioned in “How to Log In to Your WordPress Dashboard”. -
Navigate to the Customizer
From the dashboard, go to Appearance > Customize.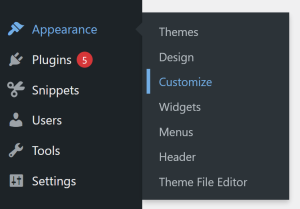
-
Find the Blog Archives Section
Inside the Customizer, go to Blog > Blog Archives. This section controls the style and layout of your archive pages, such as category pages, tag pages, and the main blog page.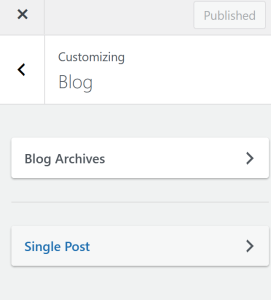
-
Move to the Blog Archives Content
Under the Blog Archives content sub-heading, you can see the Heading Tag and Content Builder.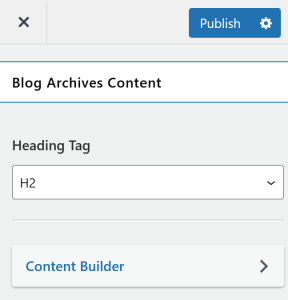
- Edit the Content Builder
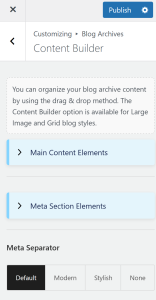
Entering the content builder, you can find sub-headings for Main Content Elements, and Meta Content Elements.
- Re-Arrange or Hide/Show Elements in the Blog
Underneath Main Content Elements and Meta Section Elements, you can see all parts of the Blog.
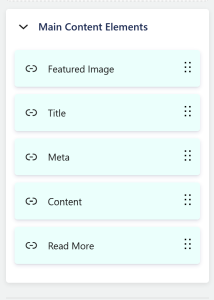
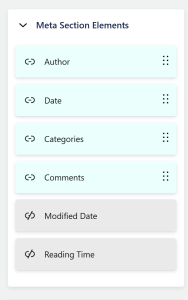
You can drag and arrange each of them by pressing the blocks. You can also hide or show elements by clicking the left icon. -
Preview Your Changes
Use the live preview to see how your blog archive pages look across desktop, tablet, and mobile devices. -
Save and Publish
Once you’re happy with your archive style settings, click Save & Publish to apply the changes to your live site.
By following these steps, you can easily style your blog archive pages in OceanWP, creating a professional look for all your blog content.