Here’s a brief guide on managing the menus of your WordPress website using OceanWP:
-
Access Your WordPress Dashboard: Log in to your WordPress site using your username and password, as mentioned in “How to Log In to Your WordPress Dashboard”.
-
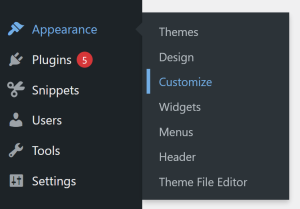
Navigate to the Customizer: From the dashboard, go to the Appearance tab and select Customize.
-
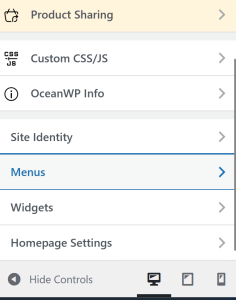
Find the Menus Section: Within the Customizer, look for the Menus section. This is where you can create, edit, and organize the menus used to navigate your site.
-
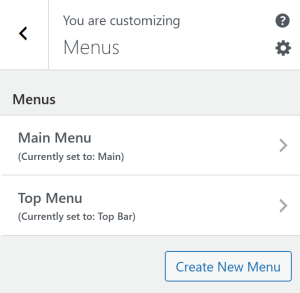
Select the Menu to Edit: OceanWP may have multiple menus depending on your layout (e.g., Primary Menu, Top Bar Menu, Footer Menu). Choose the menu you want to customize.
-
Add or Remove Menu Items
-
Add Items: Click Add Items to include pages, posts, categories or other content.
-
Remove Items: Click on a menu item and select Remove to delete it from the menu.
-
Reorder Items: Drag and drop items to change their order or create dropdown menus.
-
-
Edit Menu Item Settings: Some menu items allow additional options, such as changing the label for navigating.
-
Preview Your Changes: Use the live preview to see how the menu looks across desktop, tablet, and mobile devices.
-
Save Changes: Once you’re satisfied with your menu updates, click the Save & Publish button to make the changes live on your site.
By following these steps you can easily manage your website’s menus, making sure your users can easily navigate the site using your menus.