Here’s a brief guide on adjusting your website’s social sharing settings through the Customizer so visitors can easily share your content across different platforms:
-
Access Your WordPress Dashboard
Log in to your WordPress site using your username and password, as mentioned in “How to Log In to Your WordPress Dashboard”. -
Navigate to the Customizer
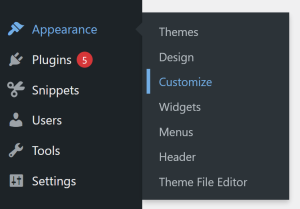
From the dashboard, go to Appearance > Customize.
-
Find the Social Sharing Section
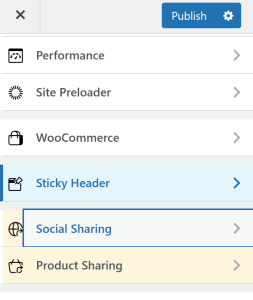
In the Customizer, look for Social Sharing. This section controls how sharing icons appear on your site.
-
Choose Social Networks to Display
Select which platforms you want to include under Sharing Buttons, such as:-
Facebook
-
Twitter (X)
-
LinkedIn
-
Pinterest
-
Email
-
-
Customize Icon Style
Adjust the appearance of your sharing icons. Options typically include:-
Icon shape
-
Icon size
-
Spacing
-
Inline or stacked layout
-
-
Edit Colors and Hover Effects
Modify icon colors, hover styles, or background colors to match your website’s branding. -
Adjust Sharing Placement
Decide where the sharing icons appear, such as above the post, below the post, or both. -
Preview Your Changes
Use the live preview to make sure the icons display cleanly and function as intended. -
Save Changes
When you’re satisfied, click Publish to apply your updated social sharing settings to your live site.
Adding clear and accessible social sharing options helps your content reach more users and encourages easy engagement with your posts.